Navigating Time Zones in Power Automate with SharePoint: A Comprehensive Super Change Guide

When working with Power Automate and SharePoint, managing time zones can be a complex task. Whether you're scheduling tasks, automating workflows, or simply trying to display the correct time on a SharePoint list, handling time zones correctly is crucial for ensuring your data is accurate and your workflows run smoothly. In this blog, we'll explore common challenges and provide step-by-step solutions to effectively manage time zones in Power Automate.
Understanding the Time Zone Challenge
SharePoint stores date and time values in Coordinated Universal Time (UTC). While this is great for consistency, it can cause issues when users in different time zones access the data. For example, a task due at 5 PM UTC will display differently for users in New York, London, and Tokyo. Power Automate, being a versatile tool, provides sever always to handle these discrepancies.
Step-by-Step Guide to Handling Time Zones in Power Automate
Step 1: Capture the Time Zone
First, it's essential to capture the user's time zone. This can be done in various ways, such as setting Regional Settings from Site Administration in Site Settings.
1. Create a SharePoint Site & List for Time Zones:
2. Set the TimeZone:
Step 2: Retrieve the Time Zone in Power Automate
Use Power Automate to retrieve the user's time zone when the workflow runs.
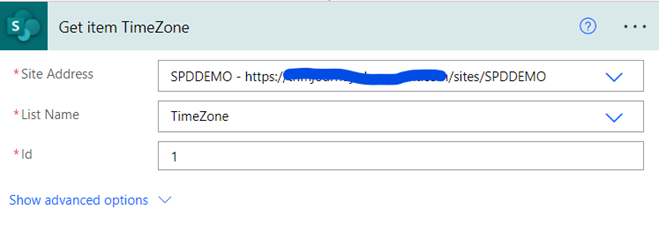
1. Get List Item:
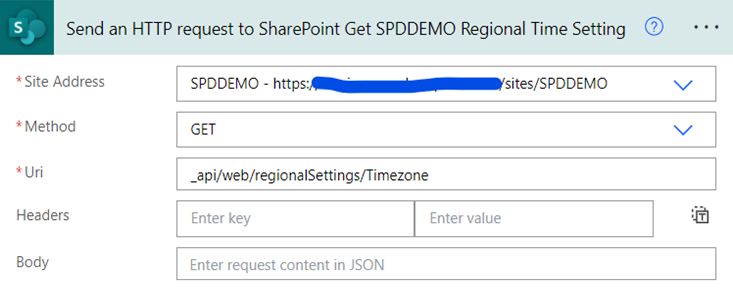
2. Get Time Zone:
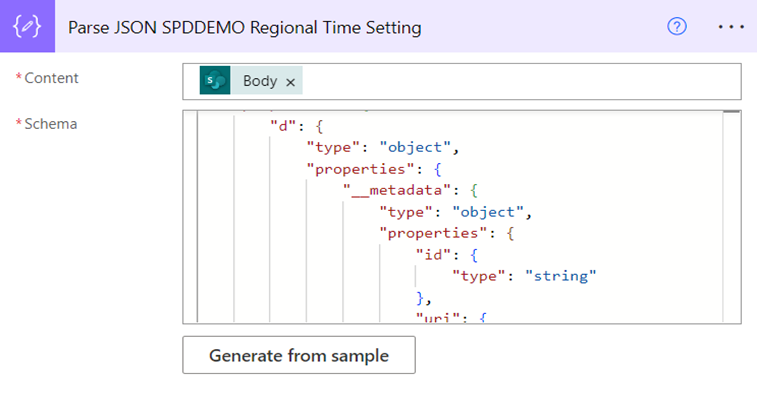
3. Simplify the output using Parse JSON
4. Change the sign of Bias:

Step 3: Convert UTC to the User's Time Zone
Convert the UTC time to the user's time zone in Power Automate using simple add Minutes function and Bias.
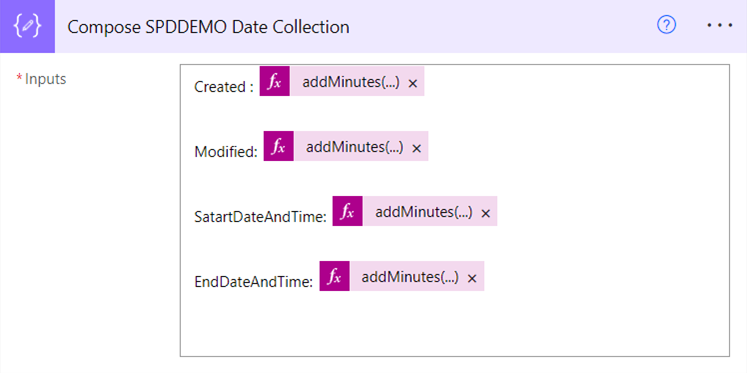
1. Add a Compose Action:


Comments
Post a Comment